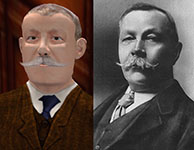
 I was approached a couple months ago by someone asking me to develop an avatar based on Sir Arthur Conan Doyle, author of the Sherlock Holmes stories and Victorian gentleman. This came at a great time because I was in the process of doing research on Late Victorian/Edwardian fashions — which would hopefully assist me in creating my line of Steampunk fashions. I decided to record the process with screenshots as I went along with the thought that people might find it helpful and maybe even interesting. This is not a tutorial. Unfortunately I just don’t have time to detail every step I took in creating the avatar. Nevertheless, I hope you find it helpful.
Shaping the Body Mesh
I started the process by finding as many source photos of Conan Doyle as possible. In speaking with the client, he specified that he wanted an older Conan Doyle, to more closely match his own age. Luckily I found some nice photos on the Web that I could use to guide the process.
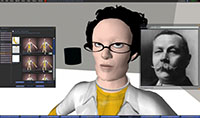
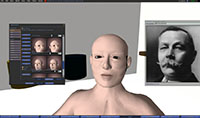
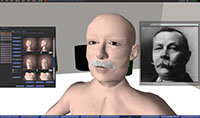 I started off using a new alt and one of the default bodies, so the process began from a completely vanilla state. As you can see in the screenshots, I did all of my initial work simply using the Second Life appearance sliders. Getting just the right look can take a fair bit of work and a lot of back and forth between different sliders.
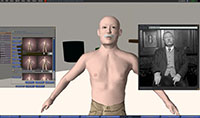 I used a separate reference photo for for fleshing out the body. Unfortunately Second Life’s avatar creation system favors perfectly formed human anatomy, so creating a stocky, heavier figure like that of the elder Conan Doyle can be an exercise in frustration. These limitations also impact texture/clothing design because the mesh (the 3d geometry that makes up the avatar) becomes more deformed, as you’ll see later on.
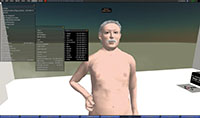 Finally I had a completed avatar shape in Second Life. I added hair and a mustache to his body using the in-world tools, but I replaced those later on with more detailed versions.
Skinning Sir Arthur
To keep costs and design time down, my client decided he did not need a complete body skin, but only the head. For those of you who have never tried your hand at creating a skin, take it from me, it is a challenging process. If you’ve ever wondered why skins are so expensive in SL it’s because their creation really does require a good technical knowledge of Photoshop (or your tool of choice) and a lot of painstaking work (nostalgia alert: I remember the days before full body skins).
Fortunately tools have come a long way in recent years to assist in the creation of skins. Most major 3D applications now cater more to video game designers; there was a time when baking textures was a difficult proposition. Baking is a process which allows the designer to create a texture (for skin, clothing) directly in the 3d application itself. If you’ve ever wondered how a lot of the top designers get great reflections or shadows on some of their clothing, it’s because they’ve baked the texture directly in their 3d application.
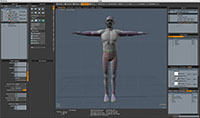 I’ve recently moved away from using Maya and am now using Luxology’s Modo, primarily because I fell in love with its interface which is completely intuitive and customizable. Modo also uses a layer-like (think Photoshop) system for its texture mapping/rendering system, as opposed to the node-based system that Maya uses. Being a longtime Photoshop user I appreciated the advantages immediately.
 The first thing I did in Modo was import the male avatar mesh OBJ file which you can find on the SL Web site. I then applied the three SL template textures (materials) each to the Head, Upper Body, and Lower Body. I then set up some simple lighting.
 Moving to Photoshop I started designing the head skin. To create the skin I used a combination of stock source photos that I’ve licensed over the years (see www.3d.sk). For Sir Arthur I used 3 different images for the various features of his face. I also created a very simple lightmap using Modo and brought that in. The base skin texture was created from scratch; I want to make sure that when I created the matching (but less detailed) body skins, the color was consistent and seamless from Upper Body skin to Head skin.
 As you can see from the screenshot of my layers palette, I had quite a few layers. I make the best use of both layer and vector masks (more on the power of vector masks in the section on clothing). I also can’t say enough good things about Photoshop CS2’s Smart Objects which allow for non-destructive re-sizing of both raster and vector image data. Even more exciting are Photoshop C3’s enhancements which, among other things, allows for non-destructive filters.
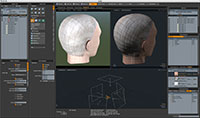
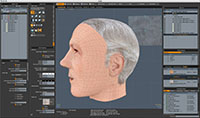 Moving back into Modo, I updated my head texture with the Photoshop file I had just worked on. In reality I did this a couple times to align and position elements on the mesh correctly. The roundtrip between Modo and Photoshop is pretty painless and makes for a great preview of any of your avatar texturing work. The hair was looking pretty good, but as you can see from the screenshot the hairline above the forehead and near the sideburns is perfectly sharp. There are a couple things you can do when designing textures — whether for avatars or other objects — that can really set you apart from the amateurs, as well as many pros.
- Show no seams
- Symmetry is boring (and lazy)
- Tidiness is also boring; make details messy
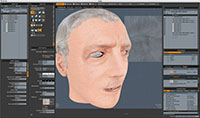 With that in mind I used Modo’s wonderful paint tools to paint onto the model’s head using my hair texture as the ‘paint.’ If you’ve never painted right on a 3d surface before, it really is next evolutionary step in the creation of avatar skins and clothing. In the screenshot you can see I’ve extended the hair on his forehead, ‘roughened’ up the seams, and extended the sideburns. I also combatted the symmetry of my hair textures on top/back of his head by liberally roughening up those as well. I should mention that I’m not actually applying paint directly to my original texture, but created a separate layer on which to paint. This will allow more flexibility when I tweak my new ‘paint’ back in Photoshop.
 While working on the head texture I referred constantly to my source image and noticed that Sir Arthur’s brows were a little bit too low. So I used Photoshop’s Liquify filter to raise them a bit. The red part of the screenshot is the part of the image that’s frozen so that when I stretched the brow up a bit, the pixels that are frozen didn’t move. Those of you who photosource clothing are already familiar with this filter, I’m sure.
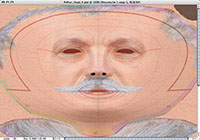
 After finishing up my work in Modo, I’m back in Photoshop to build Sir Arthur’s walrus moustache, something not unusual in his day. (Note in the first screenshot the additional hair around the top edges of the head texture — that was all painted in Modo.) The moustache I created using the various Photoshop brushes I’ve collected over the years. The shape was created with a layer mask, which I will also use to create the alpha channel for the texture when I export it.
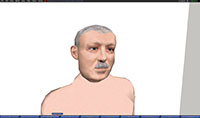 I exported my Photoshop file (which has over 50 layers, is 1024×1024 pixels, and weighs in at 33MB) to a TGA, uploaded it to Second Life, and applied the skin to the avatar form I created in the previous section. You’ll notice that I left some moustache texture on the actual skin itself, even though most of that texture will be on a prim. This will provide a nice background for the prim moustache especially when viewed from an odd angle.
 For the moustache prim itself I used a simple cube primitive and cut it down to a triangular shape. This worked a little better than a simple flat rectangle because it gives the moustache volume even when viewed from the side. I applied the moustache texture to both sides of the prim and transparent textures to the top and bottom.
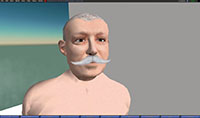 Voila! Sir Arthur is looking pretty good so far.
Ora coprirò brevemente le parti superiore e inferiore del corpo e mostrerò come ho creato abbigliamento, scarpe e accessori di Sir Arthur.
On to the clothing! Now that we’ve got the skin taken care of, we’re going to dress Sir Arthur up in some Late Victorian duds. (In case you’re just tuning in, be sure to read Part One.
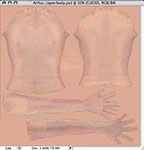 Ok, actually I first threw together a very simple body skin, primarily to allow for a smooth texture transition between the head and neck textures. This simple skin was combination of shading baked in modo, a color layer in Photoshop, and a layer with a little bit of noise in it for texture.
The Vest
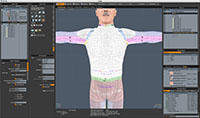
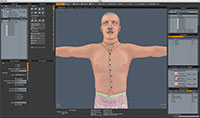 Moving into modo I took my model, which already contained the SL template, and mapped my new basic skin on top of it. I then used modo’s fantastic painting tools to draw a rough outline for Sir Arthur’s shirt and vest.
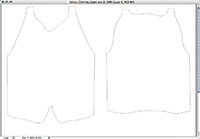 Back in Photoshop I used the pen tool to create paths based on the drawing of the vest/shirt I created in modo. Photoshop paths are one of the most important tools in your SL clothing and avatar creation toolbox because they can be used to create easily modifiable vector masks. If you’ve never used vector masks before, I urge you to do a Google search for some tutorials or check out your Photoshop manual. I’ve threatened before to release a set of vector masks I use for clothing and I promise I will very soon.
 I create the patterns for my clothing using the entire space of the image and then use vector masks to mask out an area for a specific part of the garment. You can easily move and modify vector masks to tweak your designs. For example the texture for Sir Arthur’s woolen jacket vest was created using a couple different patterns, colors, and textures (I keep these in a layer group in Photoshop so they can be easily tweaked as well). I then applied the vector mask to give me the vest shape. Next I updated my map in modo to see how it looked on the default avatar shape. Looked pretty good.
 But as you can see from these two screenshots of the shoulder area, just because it looks good on the default avatar mesh, doesn’t mean that once you customize the avatar in SL. The first screenshot is from modo and the second from the SL client.
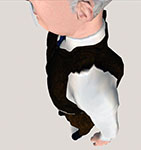 Notice the distortion in the texture caused by changes I made to the avatar to give Sir Arthur his unique, portly shape. This is very difficult to get around; not impossible, mind you, but very time consuming. I would need to grab the mesh from Second Life using something like OGLE, bring it into modo, recreate the UV maps, and match the vest using the new UVs.
The Jacket


 Next I followed a similar process to create the jacket: sketched overtop the vest in modo and then created paths in Photoshop. The second screenshot gives you an idea of the vector masks used for this clothing. Another nice thing about using vector masks is that you can use Photoshop’s layer styles. In this case I’m using a little bit of Drop Shadow to raise the lapels a bit off of the jacket.
 This is a detail closeup of the button I created; I’m using two layer styles: some Outer Glow for the black surrounding the button to give it some depth and Satin which added a nice reflective shadow across the button diagonally.
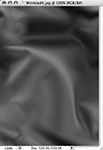 This is an example of the type of texture asset I have lots of. I composited this greyscale image of satin folds onto the jacket to give it a bit of frump, especially in the mid-section where Sir Arthur bulges a bit.
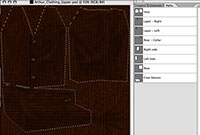 The final texture with a shot of all the paths used for vector masks. The current selection in the image (the marquee) comprise all of the pieces of the jacket.
Shoes
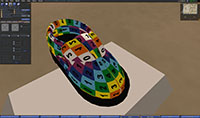
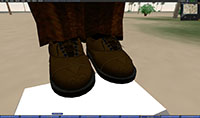 With the jacket finished I moved onto the shoes which, as you can see, were constructed in Second Life using a variety of different prims. Over the years while working on various projects in Second Life I’ve collected quite a few of what I like to call “pieces parts” — basically different prim shapes achieved through experimentation that I thought my come in handy later on. Whenever I’m attempting to construct something complex I usually pull out this collection of crazy prims to help achieve whatever shape I’m looking for. The texture in the above screenshot was a reference image that helped me create the texture for the shoes. It also allowed me to use only one single texture file (.TGA) for the entire shoe, thus reducing the bandwidth needed and time taken to see the shoes. So that’s 20 or so prims and only one texture.
Accessories
 I also created a book for Sir Arthur to hold by whipping up a fake book cover of the The Red Headed League and creating a “book holding” animation in Poser. And, just for fun, I added the entire text of the Sherlock Holmes’ story “The Red Headed League” to a notecard and put it into the contents of the book prim. And, yes, the story is public domain, so perfectly above board to do so. I’m not sure if my client has noticed it’s there yet, but someday it will be a fun surprise (unless he reads this and I’ve just ruined it!).
 Well, that’s all I’ve got for this overview of my process for creating a complete avatar. I’m hoping it’s given you some inspiration and maybe some hints for creating your own avatars. If you’ve got any questions, feel free to email me, and I’ll do my best to answer them. And if you’ve got any other ideas you’d like me to explore further, let me know.

